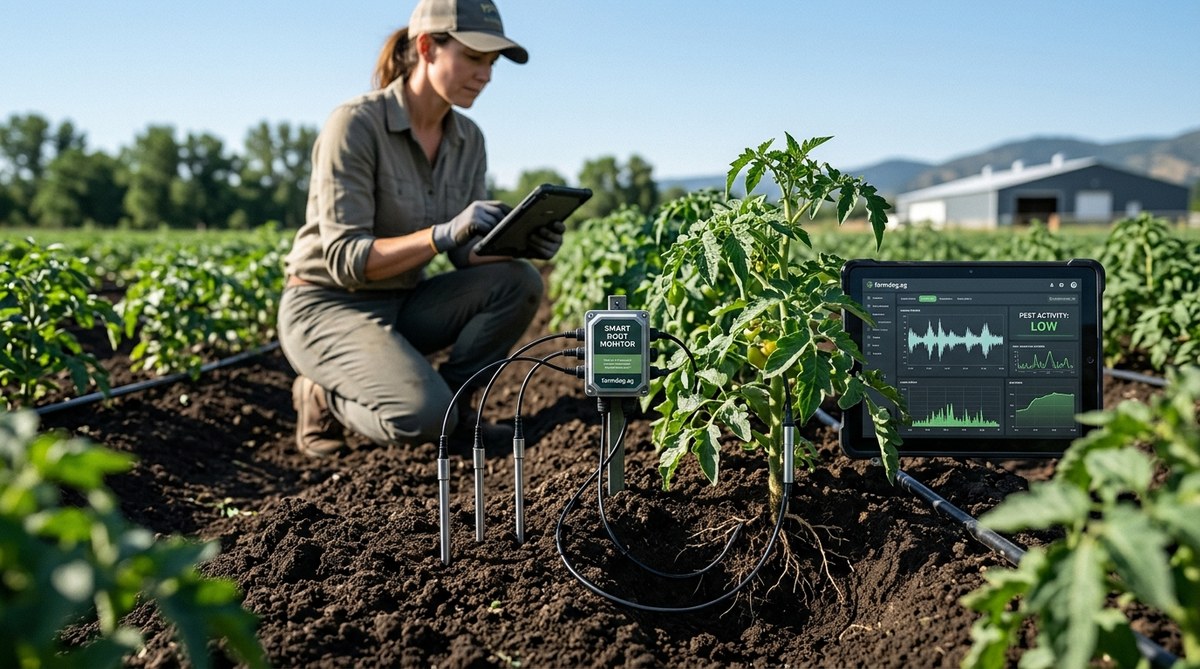
Imagine walking through your field and knowing exactly where root pests are feeding, without turning a single shovelful of soil. That is the promise of soil bioacoustics pest detection. Instead of waiting for plants to wilt or digging up roots to check for damage, you can listen to the soil itself. Root pests like grubs, wireworms, and root weevils make distinct sounds as they chew, crawl, and reproduce underground. Acoustic sensors pick up those sounds, and with the right analysis, you can identify the pest, estimate its population, and treat only the affected zones.
Soil bioacoustics pest detection uses sensitive microphones or accelerometers placed in the ground to record the sounds of feeding and moving pests. You can identify specific pest species by their unique acoustic signatures, map infestation hotspots without disturbing the soil, and reduce chemical use by treating only where needed. This method works for row crops, orchards, and high-value vegetables.
How Acoustic Sensors Capture Underground Activity
Acoustic sensors work like a stethoscope for your soil. A probe, usually a metal rod with a sensitive piezoelectric contact microphone or accelerometer at the tip, is inserted into the ground. When a root pest moves or feeds near the probe, vibrations travel through the soil particles and into the sensor. The sensor converts those mechanical vibrations into an electrical signal. That signal is then amplified, filtered to remove background noise (wind, machinery, irrigation), and recorded.
The key is understanding the acoustic signature of each pest. A corn rootworm larva chewing on a root sounds different from a white grub scraping against soil particles. Researchers have cataloged these signatures for many common pests. Once you have a baseline library, your system can automatically classify what it hears.
You can use two main types of sensors:
- Contact microphones (geophones or accelerometers): These physically touch the soil and pick up vibrations through the ground. They are excellent for detecting chewing and movement vibrations.
- Airborne microphones: These are placed in a sealed chamber above a soil sample or inserted into a burrow to capture sounds traveling through air pockets in the soil. They work well for detecting insect stridulation (the rubbing sound some beetles make).
For field deployment, most farmers use a grid of contact sensors connected to a data logger. The logger records audio clips at set intervals, say every 15 minutes, and sends them to a cloud platform for analysis. You can read more about setting up these networks in our guide on harnessing IoT devices to transform modern farming practices.
A Step-by-Step Process for Using Acoustic Sensors
Here is a practical workflow you can follow to start using soil bioacoustics pest detection on your farm this season.
-
Select your sensor type and grid layout. For most row crops like corn, soybeans, or vegetables, use contact sensors spaced 20 to 30 feet apart in a grid pattern. For orchards or vineyards, place sensors near the drip line of trees or vines. Order sensors that are rated for continuous outdoor use and have a frequency response between 10 Hz and 10 kHz (that covers the range of most root pest sounds).
-
Install the sensors at the correct depth. Insert the probe so the tip is in the root zone. For corn, that is about 4 to 6 inches deep. For tree crops, you may need to go 8 to 12 inches deep. Make sure the sensor body is snug against the soil; air gaps reduce signal quality. Cover the top of the sensor with a small soil mound to dampen wind noise.
-
Connect sensors to a data logger and set recording parameters. The logger should record for 30 to 60 seconds every 15 to 30 minutes. That sampling rate catches feeding events without generating too much data. Set a high-pass filter at 50 Hz to remove low-frequency noise from wind and traffic. Store the recordings on an SD card or transmit them via LoRaWAN or cellular to the cloud.
-
Analyze the recordings using software. Upload the audio files to a platform that uses machine learning to classify sounds. Many platforms let you train custom models for your local pest species. The software will tag each clip with a pest type and a confidence score. It will also create a heat map showing where activity is highest.
-
Ground-truth the results and take action. Start by digging a few test holes in high-activity zones to confirm the pest identity and population level. If the acoustic data matches, apply a targeted treatment only in those zones. For organic farms, this might mean applying beneficial nematodes or a biological insecticide. For conventional farms, it could mean a spot-spray of a reduced-risk insecticide. Re-scan after treatment to measure effectiveness.
Common Mistakes and How to Avoid Them
Even the best sensor setup can give misleading results if you make these errors. The table below outlines the most common mistakes and their fixes.
| Mistake | Why It Hurts Detection | How to Fix It |
|---|---|---|
| Sensor not fully contacting soil | Air gap dampens vibrations | Push sensor in firmly; wet soil slightly to improve contact |
| Recording during high wind | Wind noise masks pest sounds | Use a windscreen; record only during calm periods (dawn/dusk) |
| Sampling too infrequently | Miss short feeding bursts | Record at least every 15 minutes for 30 seconds |
| Using only one sensor type | Miss sounds that travel through air | Pair contact sensors with a microphone in a sealed chamber |
| Ignoring soil moisture effects | Wet soil transmits sound differently | Calibrate your baseline for wet and dry conditions |
| Not filtering out irrigation noise | Sprinkler sounds drown out pests | Set recording to pause during irrigation cycles |
Expert advice: Dr. Sarah Gentry, a soil bioacoustics researcher at the University of Vermont, says: “The biggest mistake I see is people trying to interpret raw audio without a reference library. You need to record known pest sounds in your own soil type first. A wireworm in sandy loam sounds different than one in clay. Build your own library before you trust the algorithm.”
What to Scan For When Listening to Your Soil
When you start analyzing acoustic data, focus on these specific sound categories. Each tells you something different about pest pressure.
- Chewing sounds: Rhythmic, repetitive crunching or scraping. These are often produced by larvae like corn rootworm, Japanese beetle grubs, and cutworms. The frequency and rhythm can help identify the species.
- Movement sounds: Irregular rustling, sliding, or scraping. These come from larger pests like mole crickets, wireworms, or even small rodents. Movement sounds often indicate active tunneling.
- Stridulation sounds: A rhythmic chirping or clicking. Some adult beetles and certain larval stages produce these sounds as a defense or communication signal. They are highly species-specific.
- Feeding cessation sounds: A sudden silence after a period of chewing. This can indicate that a pest has finished feeding on a root and moved on, or that it has been disturbed by a predator.
You can also scan for the absence of expected sounds. If you know a field had pest pressure last season, but you hear nothing in spring, that could mean the population crashed or that conditions are too cold or dry for activity. Use that information to adjust your planting or treatment schedule.
For a broader view of how these tools fit into a complete strategy, check out our article on innovative pest management techniques for sustainable farming success.
Comparing Acoustic Detection to Other Methods
How does soil bioacoustics pest detection stack up against traditional scouting? Here is a side-by-side comparison.
- Digging and visual inspection: Accurate but destructive. You disturb the soil, damage roots, and only see a tiny sample. Acoustic sensors give you continuous data across a whole field without disturbance.
- Pheromone traps: Good for adult insects but do not tell you about larvae in the soil. Acoustic sensors detect the damaging life stage directly.
- Soil sampling and Berlese funnels: Very accurate for small samples but labor-intensive and slow. You cannot sample a 40-acre field in a day. Acoustic sensors scale easily.
- Remote sensing (drones, satellites): Excellent for detecting plant stress above ground, but by the time stress is visible, the pest has already been feeding for days or weeks. Acoustic detection gives you earlier warning.
- AI-driven pest traps: These work well for flying insects. For soil pests, acoustic sensors are the only non-invasive continuous monitoring option.
Each method has its place. The best approach is to combine acoustic sensors with how to use satellite imagery for early pest detection in 2026 for a complete picture. Satellite imagery catches the above-ground symptoms, while acoustic sensors catch the underground cause.
Interpreting Your First Acoustic Heat Map
After your first week of recording, your software will likely produce a heat map of the field. Green zones show low or no pest activity. Yellow zones show moderate activity. Red zones show high activity.
Here is how to read it:
- A small, isolated red spot might be a single grub or a small colony. Dig there to confirm.
- A large red zone that expands over several days indicates an active infestation that is growing. This is your priority treatment area.
- Yellow zones that border red zones are likely the leading edge of the infestation. Monitor them closely.
- Green zones with no activity are either pest-free or have conditions that are too cold, dry, or compacted for pest activity. If the soil conditions are good for crops, you can skip treatment there.
Do not panic if you see a few red spots. Low levels of root pests are normal in most soils. The threshold for action depends on your crop and pest. For corn, the economic threshold for rootworm larvae is about one larva per plant. Acoustic sensors can detect that level reliably.
The Role of Machine Learning in Pest Identification
Modern acoustic detection relies heavily on machine learning. The software learns to recognize patterns in the audio spectrogram (a visual representation of sound frequencies over time). You train the model by feeding it labeled recordings of known pests and non-pest sounds (earthworms, rain, machinery).
The more data you give it, the better it gets. Some platforms allow you to share anonymized recordings with a community database, which improves the model for everyone. This is similar to how how to use machine learning to predict crop diseases before they spread works, but applied to sound instead of images.
A well-trained model can achieve over 90% accuracy in identifying common root pests. It can also distinguish between pest sounds and beneficial insect sounds. For example, earthworm movement sounds are lower in frequency and less rhythmic than grub chewing. You want to know where your earthworms are, not mistake them for pests.
Practical Considerations for Different Farm Scales
The cost and complexity of acoustic sensing vary by farm size.
- Home garden (under 1 acre): You can use a single handheld acoustic probe with a headphone output. Insert the probe, listen for 30 seconds, and note what you hear. This costs under $200 and takes 10 minutes per bed.
- Small organic farm (1 to 20 acres): Use 5 to 10 wireless sensors that transmit to a smartphone app. Place them in high-value beds or known problem areas. Expect to spend $1,000 to $3,000.
- Mid-size row crop farm (20 to 200 acres): Deploy a grid of 20 to 50 sensors with a central data logger and cloud analytics. This setup costs $5,000 to $15,000 but can save you much more in targeted pesticide application and avoided crop loss.
- Large commercial operation (200+ acres): Integrate acoustic sensors with your existing implementing digital soil sensors to boost crop health and productivity network. Use variable-rate technology to apply treatments only where the acoustic map shows pest activity.
For all scales, the return on investment comes from reducing chemical inputs and preventing yield loss. If you treat only the infested zones instead of the whole field, you can cut insecticide use by 50 to 80%.
Listening as a Regenerative Practice
Soil bioacoustics pest detection fits perfectly with regenerative agriculture. The method is non-invasive. It does not disturb soil structure, kill beneficial insects, or require synthetic chemicals. It gives you data to make precise, minimal interventions.
When you listen to your soil regularly, you also start to notice other things. You hear when earthworm populations are thriving (a good sign). You hear when soil is too dry (less background noise). You hear the difference between a healthy, diverse soil food web and a degraded one. Over time, you build an intuitive sense of your soil’s health that no single lab test can provide.
This approach also reduces the need for prophylactic pesticide applications. Instead of treating “just in case,” you treat only when the acoustic evidence says a pest is present and above threshold. That is better for your bottom line and for the environment.
Building Your Own Acoustic Pest Library
Start building your reference library now, even if you do not have sensors yet. Here is how:
- Collect known pest specimens from your fields. Place a few in a container of soil from your farm.
- Insert a contact sensor into the container and record the sounds for 5 minutes.
- Label the recording with the pest species, soil type, temperature, and moisture level.
- Repeat for each pest species you commonly encounter.
- Also record “silent” soil with no pests to establish a baseline.
Over one season, you can build a library of 10 to 20 pest sounds specific to your farm. That library will make your automated detection much more accurate than using generic models.
If you want to go deeper into the technology behind these systems, read our post on how edge computing is making smart farming decisions faster than ever. Edge processing allows your sensors to classify sounds locally and only send alerts, saving bandwidth and battery life.
What the 2026 Season Looks Like for Early Adopters
In 2026, several commercial acoustic sensing systems are available for agriculture. Companies like FarmDog.ag, Arable, and CropX offer integrated hardware and software packages. Prices have dropped by about 30% compared to 2024, making the technology accessible to more farmers.
The United States Department of Agriculture (USDA) has also started funding pilot projects for soil bioacoustics through its Conservation Innovation Grants program. If you are in a conservation district, check if there is funding available to offset the cost of a sensor network.
Expect to see more integration with how to build a custom smart farming dashboard that unifies all your field data. The acoustic data will sit alongside moisture, temperature, and nutrient data in a single dashboard, giving you a complete view of soil health.
A Final Word on Patience and Persistence
Soil bioacoustics pest detection is not magic. It takes a little setup, some trial and error, and a willingness to learn a new skill. But the payoff is huge. You stop guessing about what is happening underground. You stop digging up plants to check for damage. You stop applying chemicals to whole fields when only a few spots need treatment.
Start small. Buy one sensor and listen to a single bed or a few rows. Compare what you hear to what you find when you dig. Build your confidence. Then scale up.
Your soil has been talking this whole time. Now you can finally hear it.
