Farming in 2026 looks nothing like it did a decade ago. You already know that. What used to be a guessing game of weather, soil moisture, and pest pressure has turned into a data driven science. But here is the real question: how do you actually pull all those pieces together into one working machine? A soil sensor here, a drone there, an irrigation controller in the back office. That is not a system. That is a pile of gadgets. Building a true integrated smart farm system means every device talks to every other device, and all the data flows to a single dashboard where you can make decisions in real time. This guide walks you through the steps to make that happen on your operation.
A fully integrated smart farm system connects IoT sensors, automation equipment, and data analytics into one unified platform. This guide covers seven practical steps to design, install, and scale that system on your farm. You will learn how to choose sensors, set up connectivity, pick a central hub, and use real time data to boost yields while cutting waste. No fluff. Just a clear path forward.
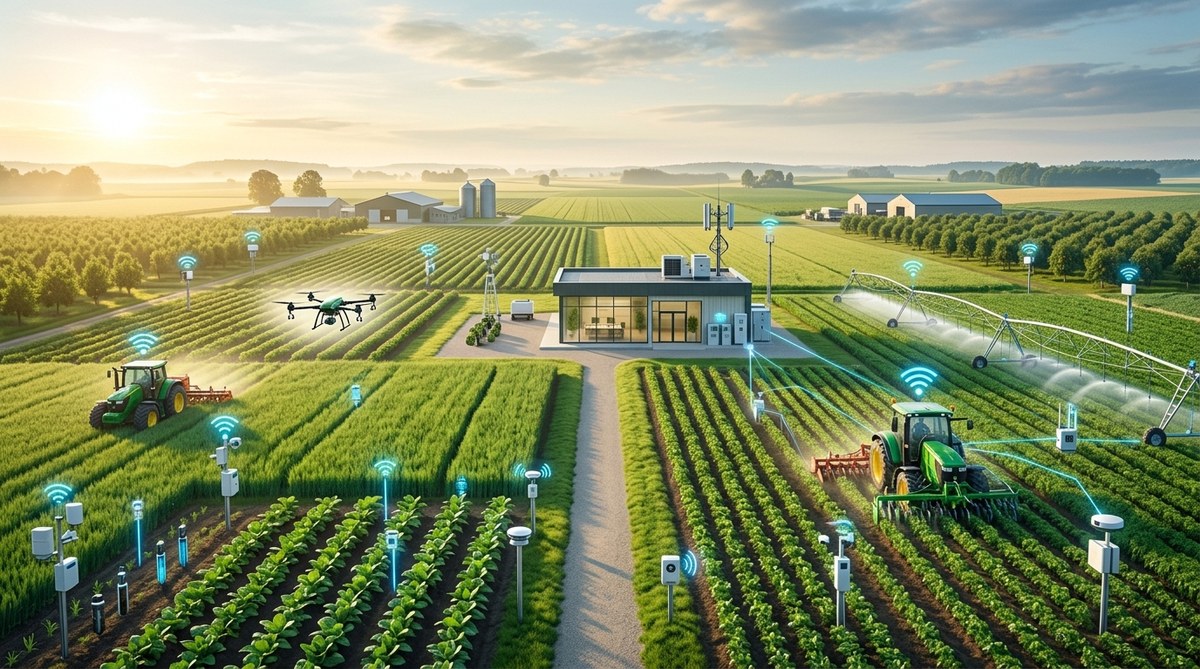
What an Integrated Smart Farm System Actually Does
Think of it as the nervous system of your farm. Sensors spread across your fields act like nerve endings. They detect temperature, moisture, nutrient levels, and even pest activity. Those signals travel through a network (the spinal cord) to a central brain. That brain processes the data, compares it against historical patterns, and sends commands back to actuators. Open a valve. Start a fertigation cycle. Send a drone to check a hot spot. Everything works together without you having to run from one end of the farm to the other.
The goal is not to replace your judgment. It is to give you better information, faster. When your soil moisture sensor says the northeast block needs water, and your weather feed confirms no rain for three days, the system can irrigate that block automatically. You get an alert on your phone with a simple summary: “Irrigated Block 4 at 6:30 AM. 0.4 inches applied.” No frantic guessing. No overwatering. No wasted trips.
Step 1: Audit Your Current Equipment and Infrastructure
Before you buy a single sensor, take a walk around your farm. What already runs on electricity or batteries? What has a digital controller? What still relies on manual valves and hand timers? Make a list.
| Equipment Type | Current Status | Integration Potential |
|---|---|---|
| Irrigation controller | Manual timer | Replace with WiFi enabled unit |
| Soil moisture probes | None | Install wireless sensors |
| Weather station | None | Add IoT connected station |
| Fertigation system | Manual | Upgrade to automated injection |
| Drones | Camera only | Add multispectral sensor |
| Grain bin monitoring | None | Add temp and moisture sensors |
This audit helps you see where the gaps are. You might find that your pivot irrigation system already has a PLC that can talk to a central network. Or you might realize your fertigation setup needs a complete overhaul. Either way, you now know your starting point.
Step 2: Choose Your Connectivity Backbone
Sensors are useless if they cannot talk to each other. You need a reliable network across your whole property. In 2026, the options are better than ever.
- LoRaWAN is the most popular choice for large farms. It covers miles of range with low power consumption. Sensors can run for years on a single battery.
- Cellular (4G/5G) works well if you already have good coverage. It handles video from drones and cameras but costs more per device.
- Mesh networks (Zigbee, Z Wave) work for smaller farms or indoor operations like greenhouses. They are cheaper but have shorter range.
- Satellite is the fallback for remote operations with zero cell signal. It is slower and pricier, but it works everywhere.
Pick the backbone that matches your farm size and terrain. Most integrated smart farm systems use a hybrid approach. LoRaWAN for field sensors, cellular for the main hub, and WiFi inside buildings.
Step 3: Install Smart Sensors in the Right Places
Sensors are the eyes and ears of your system. But more is not always better. Strategic placement matters more than sensor count.
Start with soil moisture and temperature sensors. Place them at different depths (4 inches, 12 inches, 24 inches) to track water movement through the root zone. Space them across different soil types on your farm. Sandy ground dries faster than clay. If you treat them the same, you waste water.
Add a weather station that measures rainfall, wind speed, solar radiation, and humidity. This data feeds into your irrigation scheduler and pest models. Without it, your system is flying blind.
Install flow meters on every irrigation line. They tell you exactly how much water each block receives. Leaks, clogged emitters, or pressure drops show up immediately.
For more detail on getting the most out of soil data, check out our guide on implementing digital soil sensors to boost crop health and productivity.
Step 4: Set Up Your Central Data Platform
This is the brain of your integrated smart farm system. Every sensor feeds into this platform. Every automation rule runs from it. You check it on your phone, tablet, or laptop.
There are two paths here. You can use a commercial platform built for agriculture, or you can build your own using tools like Node RED, Home Assistant, or AWS IoT. Most farm owners go with a commercial option because it saves time and comes with support.
Look for a platform that:
– Accepts data from multiple brands of sensors
– Offers customizable dashboards
– Supports automation triggers (if soil moisture drops below X, start irrigation)
– Stores historical data for at least one full season
– Integrates with your existing equipment
Do not underestimate the importance of a good user interface. If the dashboard is confusing, you will stop using it. Pick something you actually want to open every morning.
Step 5: Build Automation Rules and Alerts
Data without action is just noise. Automation turns that data into results. Start with simple rules and add complexity as you get comfortable.
Rule 1: When soil moisture at 12 inches falls below 30%, and no rain is forecast in the next 48 hours, start irrigation for Block 3. Run for 45 minutes. Check moisture again. Stop when it reaches 70%.
Rule 2: When wind speed exceeds 15 mph, pause all overhead irrigation. Resume when wind drops below 10 mph for 10 consecutive minutes.
Rule 3: When temperature inside the grain bin rises above 85F, turn on the aeration fan. Log the event.
Set up alerts for things that need your attention. A valve that did not open. A pump that lost pressure. A sensor that stopped reporting. These alerts should go to your phone, but not at 3 AM for something that can wait until morning. Configure urgency levels.
To see how predictive models can sharpen your automation rules, read about why predictive analytics is a game changer for crop management in 2026.
Step 6: Integrate AI and Computer Vision
This is where your system goes from reactive to predictive. AI models can look at your field data, weather forecasts, and historical yields to recommend actions before problems show up.
Computer vision adds another layer. Mount cameras on your pivot or fly a drone with a multispectral sensor. The system analyzes plant color, canopy cover, and early signs of stress. It can spot nutrient deficiencies, disease pressure, or pest damage before your eyes can.
You do not need to be a data scientist to use these tools. Modern platforms have pre built models for common crops. You just train them on your own fields by tagging a few images and letting the system learn.
For a deeper look at how drones fit into this workflow, see our guide on how to leverage drone technology for precision farming in 2026.
Step 7: Monitor, Maintain, and Scale
Your system is live. Sensors are streaming. Valves are opening and closing. Alerts are coming in. Now the real work begins.
Check your dashboard daily at first. Look for anomalies. A sensor that reads 10 degrees hotter than its neighbors might be in direct sunlight. A flow meter that shows zero when the valve is open means a blockage.
Keep a maintenance log. Batteries die. Sensors get buried. Wifi modules lose connection. Build a monthly checkup routine. Walk a few sensors, clean their surfaces, and verify their readings against a handheld tool.
Scale gradually. Once your first field is running smoothly, add another. Connect your livestock waterers. Bring in your grain bin monitors. Link your greenhouse controllers. Each addition makes the whole system more valuable.
“The biggest mistake I see is people trying to wire up their entire farm in one weekend. Start with one field. Get it right. Then grow. A system that works perfectly on 40 acres is better than a broken system on 400.”
Mark Tipton, Precision Ag Specialist, FarmDog Ag
Common Mistakes When Building a Smart Farm System
Even experienced operators hit snags. Here are the most common ones and how to avoid them.
| Mistake | Why It Happens | How to Fix It |
|---|---|---|
| Mixing incompatible brands | Not checking API compatibility before buying | Choose one platform first, then buy sensors it supports |
| Poor sensor placement | Placing sensors in convenient spots instead of representative spots | Map your soil zones and place sensors in each zone |
| Ignoring data quality | Trusting uncalibrated sensors | Validate every sensor against a manual reading monthly |
| No backup plan | Relying on one internet connection | Add a cellular failover or local storage on the hub |
| Over automation | Setting rules that override common sense | Always include a manual override and a 10 minute delay |
Avoid these pitfalls and your system will be more reliable from day one.
If you want to learn more about using data from your sensors to improve yields, check out our article on top strategies for using data analytics to maximize crop yields.
What Your Daily Routine Looks Like With a Fully Integrated System
Here is a realistic picture of a morning with your integrated smart farm system running.
You pour your coffee and open the app. The dashboard shows a green checkmark for every zone. Soil moisture is in the target range across all blocks. The weather feed shows a 40% chance of light rain this afternoon. The system has already paused irrigation for the east field based on that forecast.
You scroll to the alerts tab. Two items. A low battery on sensor 14 in Block 2. You add it to your supply list. A flow anomaly on the west pivot. The system detected a pressure drop and shut the valve. You look at the camera feed and see a gopher hole near the main line. You grab your shovel on the way out.
At noon, you get a push notification. The drone scan is complete. The AI model identified a nitrogen deficiency in a 2 acre patch of the south field. It recommends a variable rate application at 1.2x the standard rate. You approve it with a tap. The fertigation system handles the rest.
That is the power of integration. Not more work. Smarter work.
Putting Your Integrated Smart Farm System Into Action
You now have the full roadmap. Audit your gear. Pick your network. Install sensors where they matter. Choose a central platform. Write automation rules. Add AI when you are ready. Scale field by field.
Start with the step that feels most urgent. Maybe it is the irrigation control. Maybe it is soil moisture monitoring. That is fine. The important thing is to start. Each piece you add makes the next piece easier.
Your farm already produces food, fiber, or fuel. An integrated smart farm system helps you do it with less waste, less stress, and more confidence. The technology is ready. The tools are affordable. The only missing piece is the decision to begin.
Pick one field. Pick one problem. Build your first connection. Then watch it grow.