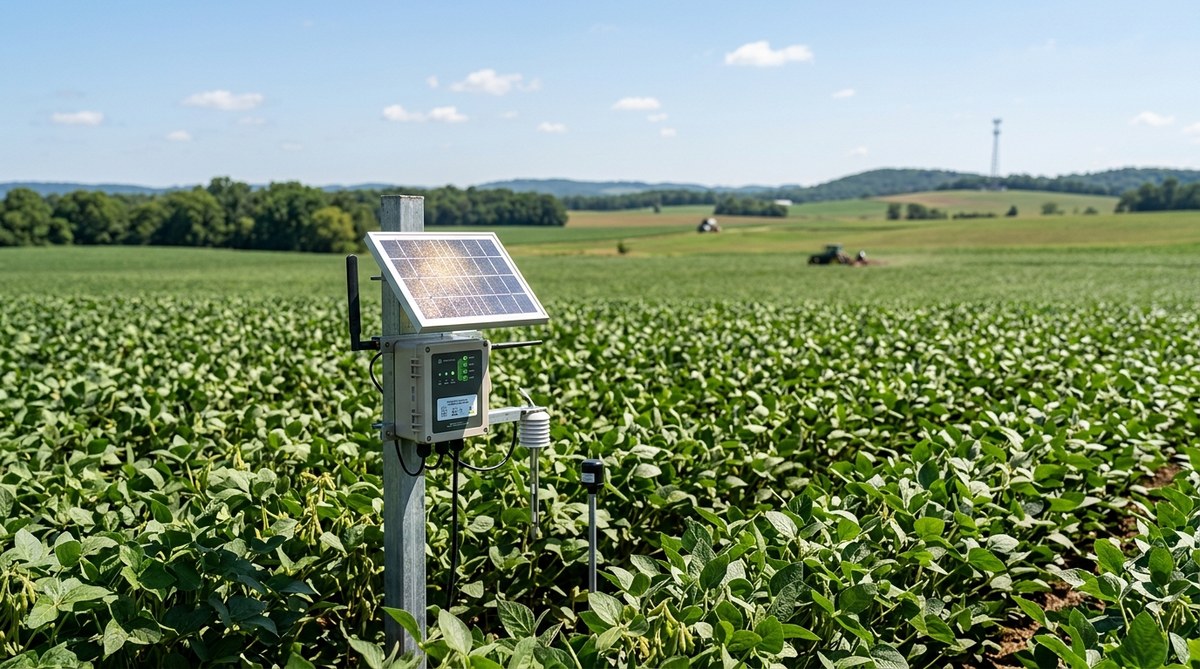
You are standing at the edge of a 160-acre cornfield in western Kansas. The soil moisture sensor you installed last spring stopped reporting three weeks ago. You drove out there, swapped batteries, and it worked for two days. Now it is silent again. The nearest power outlet is a mile away. The cellular signal is weak. You are not alone. Field engineers, IoT project managers, and agricultural researchers across the country face the same headache: how do you keep sensors talking when there is no grid and no reliable cell service?
Solar powered sensors sound like the obvious fix. Sunlight is free. Panels are cheap. But the real question is whether they can actually deliver consistent, low-power connectivity in the tough, remote conditions where you need them most. The answer is yes, but only if you understand the limits, pick the right hardware, and plan for the worst case weather. Let us walk through what works, what does not, and how to set up a system that stays online through a Nebraska winter or a Texas summer.
Solar powered sensors can solve remote field connectivity problems when you match the panel size to the local solar insolation, use low-power communication protocols like LoRaWAN, and include a battery buffer for cloudy stretches. The biggest mistake is undersizing the power budget. A well designed solar sensor node costs less than trenching cable and delivers data year round with minimal maintenance.
Why Remote Fields Are So Hard on Connectivity
A remote field is not just far away. It is usually shaded by trees, located in a valley, or buried under snow for weeks at a time. Standard WiFi does not reach. Cellular towers are often miles away, and the signal drops behind a hill. Running copper wire or fiber optic cable to a single sensor can cost thousands of dollars per foot when you factor in trenching, permits, and labor.
The core problem is power. A typical soil moisture sensor draws a small amount of current, maybe 50 milliamps during a reading. But the radio transmitter that sends that data back to the cloud draws much more. If the radio has to boost the signal to reach a distant gateway, the power draw spikes. Without a steady source of electricity, the sensor dies after a few transmissions.
Solar panels solve the power supply problem, but they introduce a new one: variability. A panel that works fine in July might produce only 20 percent of its rated output during a rainy December week. If you sized the system for summer sun, the sensor will freeze or go dark in the winter.
How Solar Powered Sensors Actually Work
A solar sensor node has four main parts:
- Solar panel (usually polycrystalline or monocrystalline)
- Charge controller
- Rechargeable battery (lithium-ion or lithium iron phosphate)
- Sensor and radio module
The panel charges the battery during the day. The battery powers the sensor and radio at night and during cloudy periods. The charge controller prevents overcharging and extends battery life.
The magic happens when you pair this with a low-power wide-area network (LPWAN) protocol like LoRaWAN. These radios use very little energy because they send small packets of data over long distances. A single AA-sized battery can power a LoRaWAN sensor for a year. Add a small solar panel, and that same sensor can run indefinitely.
For a deeper look at how these networks fit into a larger farm system, check out our guide on how to deploy LoRaWAN networks for cost-effective field monitoring.
The Three Biggest Mistakes People Make
I have seen smart people waste a lot of money on solar sensors that failed. Here are the most common errors.
1. Sizing the Panel for Summer Only
A 10-watt panel might keep a sensor running from May through September in Ohio. But from November through February, the sun is lower, days are shorter, and cloud cover is heavy. That same panel might produce only 2 watt-hours per day in December. If your sensor needs 3 watt-hours, the battery drains and never recovers.
The fix: Use the worst month solar insolation data for your location. The National Renewable Energy Laboratory (NREL) publishes free maps. Size your panel for December, not July.
2. Forgetting About Snow and Dirt
A panel covered in snow produces almost nothing. A panel covered in dust loses 10 to 20 percent of its output. In remote fields, nobody is climbing a pole to wipe off a sensor every week.
The fix: Mount panels at a steep angle (45 degrees or more) so snow slides off. Use anti-reflective glass that sheds dirt. Plan for a 20 percent derating factor in your power budget.
3. Using the Wrong Battery Chemistry
Lead-acid batteries are cheap but heavy and inefficient in cold weather. A lead-acid battery at 32 degrees Fahrenheit holds only about 70 percent of its rated capacity. At 0 degrees, it drops to 50 percent.
The fix: Use lithium iron phosphate (LiFePO4) batteries. They are lighter, last longer, and maintain over 90 percent capacity at freezing temperatures.
How to Set Up a Reliable Solar Sensor Node
Here is a practical step-by-step process that field engineers and project managers can follow.
-
Calculate your daily power budget. List every component: sensor, radio, microcontroller. Multiply the current draw (in milliamps) by the hours of operation per day. Add 20 percent overhead for inefficiency and aging.
-
Determine your worst case solar insolation. Look up the lowest monthly average for your county. In the upper Midwest, that might be 1.5 peak sun hours per day in December. In the Southwest, it might be 3.5.
-
Size the solar panel. Divide your daily power budget (in watt-hours) by the worst case peak sun hours. Multiply by 1.5 for a safety margin. That gives you the minimum panel wattage.
-
Size the battery. Multiply your daily power budget by the number of days of autonomy you want. Three to five days is standard. Seven days is better for northern climates. Choose a LiFePO4 battery with that capacity.
-
Select a low-power radio. LoRaWAN is the gold standard for remote agricultural sensors. It can transmit up to 10 miles in open country and uses very little power. Avoid WiFi or Bluetooth for distances over 300 feet.
-
Test before deployment. Run the node indoors for a week with a simulated solar panel. Then test it outside for at least two weeks. Monitor the battery voltage daily to make sure the charge controller is working.
Comparing Communication Protocols for Remote Sensors
Choosing the right radio protocol is just as important as sizing the solar panel. Here is a comparison of the most common options.
| Protocol | Range | Power Use | Data Rate | Best For |
|---|---|---|---|---|
| LoRaWAN | 2-10 miles | Very low | 0.3-50 kbps | Soil moisture, weather, cattle tracking |
| NB-IoT | 1-5 miles | Low | 10-100 kbps | Areas with cellular coverage |
| LTE-M | 1-5 miles | Medium | 200 kbps-1 Mbps | Video, firmware updates |
| Zigbee | 30-300 feet | Low | 250 kbps | Orchard mesh networks |
| Satellite | Global | High | 1-100 kbps | Extreme remote, no other option |
LoRaWAN is usually the best fit for solar powered remote sensors because it balances long range with extremely low power draw. If you need to send high resolution images or large data logs, you might need LTE-M, but that will require a bigger solar panel and battery.
For more on how sensors connect to the bigger picture of farm data, read about harnessing IoT devices to transform modern farming practices.
What the Data Actually Costs
Let us talk dollars. A typical solar powered LoRaWAN sensor node costs between $150 and $400 in parts. That includes the sensor, solar panel, battery, charge controller, and enclosure. A commercial gateway that covers a square mile costs around $500 to $1,000.
Compare that to trenching a single power and data line to a sensor 1,000 feet from a building. That trench costs $1,500 to $3,000, and you still need to run conduit and cable. Solar sensors pay for themselves the day you install them.
The ongoing cost is minimal. You might replace the battery every three to five years. The panel should last 20 years. The sensor itself depends on the type. Soil sensors eventually drift and need recalibration, but that is a separate issue.
“The biggest lie in agtech is that solar sensors are ‘set and forget.’ They are not. They need proper sizing, seasonal checks, and a clear line of sight to the gateway. But when you do it right, they are more reliable than grid-tied sensors in remote locations.” – Sarah Kline, Field IoT Engineer, Midwest Ag Solutions
When Solar Sensors Are Not the Answer
Let me be honest. Solar sensors are not a magic bullet. They struggle in these situations:
-
Dense forests. A canopy of leaves blocks most sunlight. You would need a large panel mounted above the trees, which is expensive and vulnerable to wind.
-
High latitudes with long polar nights. If you are monitoring permafrost in northern Alaska, you might go weeks without sun. You would need a massive battery bank or a different power source like a small wind turbine.
-
Extreme dust or ash. Near feedlots, unpaved roads, or wildfire zones, panels can get coated so fast that even weekly cleaning is not enough. Automated wiper systems exist but add cost and complexity.
-
Very high data volume. If you need to stream video or send thousands of readings per hour, solar becomes impractical. You need a wired connection or a large solar array with battery storage.
For most agricultural and environmental monitoring, these edge cases are rare. The vast majority of remote fields get enough sun to keep a well designed solar sensor running.
How to Monitor Your Solar Sensor Remotely
You do not want to drive 40 miles to check if a sensor is working. The whole point of a solar sensor is that it reports data without you visiting. But how do you know if the sensor itself is healthy?
The best systems include a telemetry feature that reports the battery voltage and solar panel current along with the sensor data. Set up an alert in your dashboard. If the battery voltage drops below a threshold, you get a text message. That gives you time to visit before the node dies.
Some advanced systems also report the panel temperature and charge controller status. This helps you diagnose a dirty panel or a failing battery without leaving your desk.
For more on turning that data into action, see our article on top strategies for using data analytics to maximize crop yields.
Putting It All Together for Your Next Deployment
If you are planning a remote sensor network this season, here is a checklist to keep you on track.
- Use worst case solar data, not annual averages
- Choose LiFePO4 batteries for cold weather reliability
- Mount panels at 45 degrees or steeper for snow shedding
- Plan for 5 to 7 days of battery autonomy
- Use LoRaWAN if range and power are your main concerns
- Include battery voltage telemetry in every node
- Test the system for at least two weeks in real conditions
- Budget for one maintenance visit per year
The Future of Solar Sensor Connectivity
By 2026, we are seeing solar sensor nodes that are smaller, cheaper, and more efficient than ever. New panel technologies like bifacial glass capture light from both sides, boosting output in snowy conditions. Better charge controllers with maximum power point tracking (MPPT) squeeze more energy out of small panels. And the cost of LiFePO4 batteries has dropped by half in the last five years.
The next big shift is edge computing. Instead of sending every raw reading to the cloud, the sensor processes data locally and sends only summaries or alerts. This cuts power draw by an order of magnitude. Imagine a sensor that runs for two years on a single solar panel the size of a credit card. That is where we are heading.
For a look at how edge computing fits into the broader smart farm, read about how edge computing is making smart farming decisions faster than ever.
A Real World Example
A colleague of mine manages a 2,000 acre ranch in eastern Montana. He needed soil moisture data from six pivot corners. The nearest power line was three miles away. Cellular coverage was spotty at best.
He installed six LoRaWAN soil sensors, each with a 20-watt solar panel and a 20 amp-hour LiFePO4 battery. The gateway sits on a grain bin roof 40 feet high. The sensors report every hour. In three years of operation, he has had zero outages. He visits each node twice a year to clean the panel and check the connections. That is it.
The total cost was about $3,500. Trenching power to just one of those locations would have cost more than $10,000. The sensors paid for themselves in the first season by letting him adjust irrigation schedules based on real data instead of guesswork.
Your Next Steps for Better Remote Field Connectivity
Solar powered sensors can absolutely solve your remote field connectivity problems. But they require honest planning. You cannot just buy a consumer grade solar light kit and strap a sensor to it. You need to match the panel, battery, and radio to your specific location and data needs.
Start with the power budget. That is the one calculation that determines everything else. If you get that wrong, nothing else matters. If you get it right, you will have a sensor network that runs for years with almost no attention.
If you want to see how these sensors integrate with other precision tools on your farm, check out our guide on implementing digital soil sensors to boost crop health and productivity.
Go ahead and sketch out your power budget today. Pick your worst case month. Run the numbers. You will be surprised how simple it is once you have the right framework. And if you get stuck, reach out. There are plenty of field engineers and agtech specialists who have been through the same process and can help you avoid the common pitfalls.
