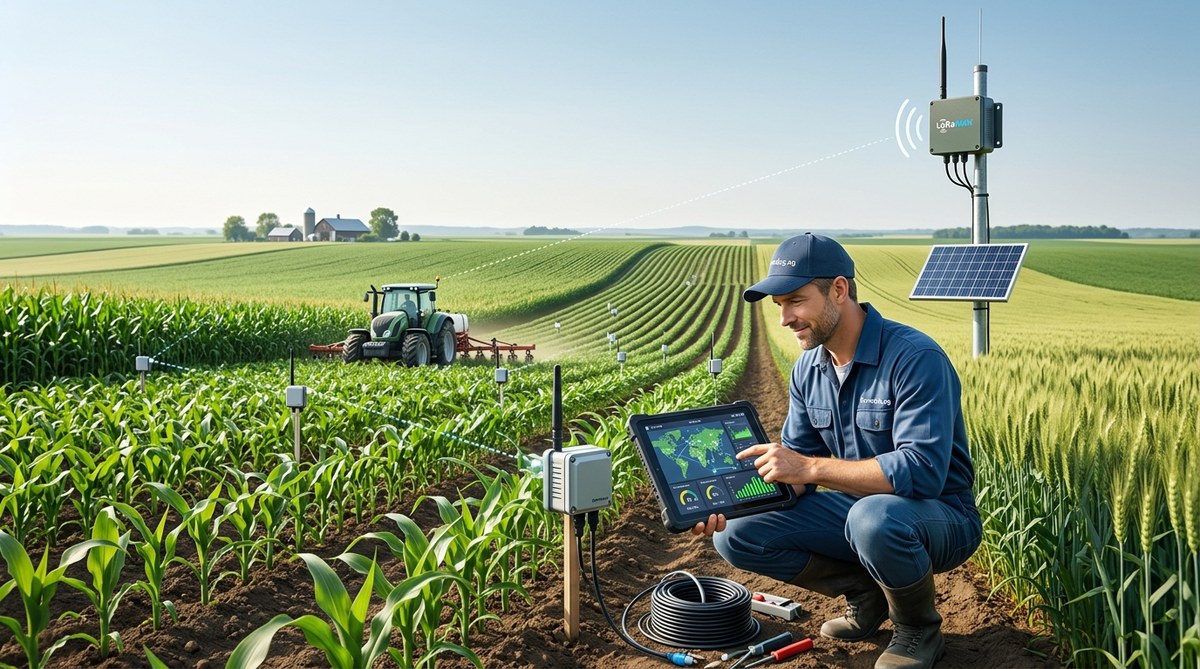
You are standing at the edge of a 200-acre cornfield. Your phone shows zero signal bars. The nearest Wi-Fi router is a mile away, sitting in a climate-controlled office. Yet you need soil moisture readings from six different zones, every hour, for the next four months. This is where LoRaWAN field monitoring deployment stops being a theoretical exercise and becomes a real-world engineering challenge.
LoRaWAN is the quiet workhorse of remote sensing. It sends tiny data packets over long distances using very little power. A single gateway can cover thousands of acres if you place it right. But “if you place it right” is doing a lot of work. This guide walks you through the practical steps to deploy a LoRaWAN network for field monitoring without blowing your budget. We cover site surveys, gateway positioning, sensor selection, and the common pitfalls that turn a good plan into a frustrating troubleshooting session.
A successful LoRaWAN field monitoring deployment relies on three pillars: a thorough site survey, careful gateway placement at elevation, and matching sensor class to your data needs. Skip any of these and you will face coverage gaps or battery failures. This guide gives you a repeatable process to avoid those mistakes and keep your project under budget.
Start with a Site Survey, Not a Shopping List
It is tempting to buy a dozen sensors and a gateway and hope for the best. Resist that urge. A site survey costs you time but saves you money. You need to understand the terrain, the crop height at maturity, and any existing structures.
Walk the field boundaries first. Note any hills, tree lines, or buildings that could block a signal. LoRa radio waves travel farther over flat, open ground. A 10-foot rise in elevation can double your coverage radius. Use a handheld LoRa test device or a simple radio mapper app to check signal strength from potential gateway locations.
Here are three things to measure during your survey:
- Maximum distance between the farthest sensor and the proposed gateway location.
- Obstruction height of crops or treelines at their tallest point during the growing season.
- Existing infrastructure like center pivot towers, grain bins, or metal sheds that can reflect or absorb signals.
Expert advice: Spend half a day walking the field with a GPS logger and a basic LoRa sniffer. Mark every spot where the signal drops below -120 dBm. Those are your dead zones. You can then decide if you need a second gateway or if you can reposition the first one.
Choose the Right Gateway for Your Field Size
Not all gateways are built the same. An indoor gateway designed for a smart home lab will not survive a summer in a dusty equipment shed. For agricultural LoRaWAN field monitoring deployment, you need an outdoor-rated unit with an IP65 or higher enclosure.
Consider these gateway options:
| Gateway Type | Coverage Range (open field) | Power Source | Best For |
|---|---|---|---|
| Indoor / Home | 1-3 miles | Wall outlet | Small test plots near buildings |
| Outdoor / Industrial | 5-10 miles | PoE or solar + battery | Large fields, remote locations |
| Solar-powered | 3-7 miles | Solar panel + battery | Off-grid pastures, no power access |
| 4G/LTE backhaul | 5-10 miles | Solar or DC | Sites without Ethernet or Wi-Fi |
A common mistake is buying an indoor gateway and mounting it on a pole without weatherproofing. Rain and condensation will kill the electronics within weeks. Spend the extra money on an outdoor unit. It is cheaper than replacing a failed gateway mid-season.
Sensor Selection and Class Matching
LoRaWAN defines three device classes. Each class balances battery life against latency. For field monitoring, you will mostly use Class A devices.
- Class A: The sensor wakes up, sends a data packet, then listens for a short window. It goes back to sleep. Battery life can exceed five years. This is ideal for soil moisture, temperature, and rain gauges.
- Class B: The sensor opens scheduled receive windows. Useful if you need to send commands or update firmware in the field. Battery life drops to one to two years.
- Class C: The sensor listens continuously. Battery life is measured in weeks. Use this only for sensors near a power source, like a weather station on a solar panel.
For a typical field monitoring deployment, stick with Class A sensors. They are cheaper, last longer, and require less maintenance. If you need to change sampling intervals remotely, choose a Class B sensor from a manufacturer that supports over-the-air updates.
The Five-Step Deployment Process
Follow this numbered process to keep your project on track and under budget.
- Conduct a radio site survey. Use a handheld LoRa tester to map signal strength across the field. Identify the best elevation for your gateway. Aim for a location that covers at least 80% of the field with a single unit.
- Mount the gateway at least 15 feet above ground. Attach it to a pole, a grain bin roof, or a dedicated tower. Higher is almost always better. Use a lightning arrestor if you are in an area with frequent storms.
- Install sensors in a grid pattern. Place the first sensor near the gateway to confirm connectivity. Then work outward. Test each sensor before moving to the next location. Do not install all sensors at once and hope they connect.
- Configure the network server. Set up your data pipeline. Most gateways work with open-source servers like Chirpstack or commercial platforms like The Things Network. Define your data rate, frequency plan, and authentication keys.
- Run a 48-hour validation test. Let the network run for two full days. Check for missed packets, battery drain, and coverage gaps. Adjust sensor placement or add a repeater if needed.
Common Mistakes and How to Avoid Them
Even experienced IoT engineers make errors during LoRaWAN field monitoring deployment. Here is a table of the most frequent mistakes and their fixes.
| Mistake | Why It Happens | How to Fix It |
|---|---|---|
| Gateway placed too low | Mounted on a fence post or equipment shed | Relocate to a 20-foot pole or rooftop |
| Sensors too far apart | Assumed 10-mile range in all conditions | Reduce spacing to 2-3 miles in hilly terrain |
| Wrong antenna type | Used a dipole antenna in a metal enclosure | Switch to an external fiberglass antenna |
| Ignoring crop growth | Survey done in winter, crops 8 feet tall in summer | Add a repeater or raise the gateway higher |
| No backup power | Gateway on grid power, outage kills data | Add a battery UPS or solar panel |
One project manager I worked with lost two weeks of soil data because his gateway was plugged into an outlet inside a livestock barn. A cow knocked the power cord loose. A simple battery backup would have saved the data and his sanity.
Integrate Your Data into a Farm Management System
A LoRaWAN network is only as useful as the data it delivers. Raw sensor values mean little if they sit in a database no one reads. Connect your network server to a dashboard or a farm management platform.
You can push data into tools like FarmDog, Ag Leader, or Climate FieldView. Many network servers support MQTT or HTTP POST integrations. Set up alerts for thresholds. For example, send a text message when soil moisture drops below 30% in Zone 3. That turns raw data into an action.
If you are new to data pipelines, start with a simple setup. Use Node-RED to connect your LoRaWAN server to a Google Sheet or a local database. Later, you can upgrade to a dedicated harnessing IoT devices to transform modern farming practices platform that handles scaling and analytics.
Budget-Conscious Hardware Recommendations
You do not need enterprise-grade hardware for a successful deployment. Mid-range equipment works well if you choose wisely.
- Gateway: Dragino LWL02 or RAKwirell RAK7249. Both are outdoor-rated, support 8 or 16 channels, and cost under $500.
- Sensors: Seeed Studio LoRaWAN soil moisture sensor or Elsys ERS. Both are Class A, run on AA batteries, and cost between $60 and $120 each.
- Antenna: A 5 dBi fiberglass omnidirectional antenna. Costs about $30 and significantly improves range.
- Cable: LMR-400 low-loss coaxial cable. Do not use cheap RG58 cable over long runs. Signal loss will kill your range.
Buy one gateway and five sensors for your first deployment. Test everything. Once you confirm the system works, scale up. This approach keeps your initial investment low and gives you a proven blueprint for expansion.
The Near-Far Problem and How to Handle It
LoRaWAN uses a listen-before-talk protocol. If one sensor is very close to the gateway and another is very far, the close sensor can drown out the far sensor. This is called the near-far problem.
Mitigate it by using adaptive data rate (ADR). ADR instructs the network server to adjust the data rate and transmission power for each sensor. A close sensor gets a higher data rate and lower power. A far sensor gets a lower data rate and higher power. Enable ADR from day one. Most modern gateways and network servers support it.
If you still see packet loss from distant sensors, add a repeater node. A repeater listens for sensor packets and retransmits them to the gateway. It costs about $100 and can resolve coverage gaps without adding a second gateway.
Maintenance and Seasonal Adjustments
A LoRaWAN network is not a set-it-and-forget-it system. You need to check it before each growing season.
- Battery checks: Replace batteries in all sensors before the season starts. A dead sensor in the middle of August is a lost data point.
- Antenna inspection: Look for corrosion, loose connectors, or bird damage. Clean the antenna and apply dielectric grease to the connectors.
- Firmware updates: Check for updates from your gateway and sensor manufacturers. Updates often fix bugs and improve security.
- Crop height review: If you planted a taller variety this year, your gateway may need to be raised. Plan for this during the spring survey.
One farmer in Nebraska told me he sets a calendar reminder for the first week of April. He walks every gateway location, swaps batteries, and runs a signal test. It takes him half a day and saves him from mid-season failures.
Putting Your First LoRaWAN Network to Work
You have mapped the field, mounted the gateway, installed the sensors, and confirmed data flow. Now what? Start small. Pick one variable to track, like soil moisture in a high-variability zone. Watch the data for two weeks. Compare it with your visual observations. Build trust in the system before you expand to 20 sensors.
Use the data to make one decision. Maybe you delay irrigation by a day because the sensors show adequate moisture. Maybe you spot a dry patch that needs a different seeding rate next year. That single decision can pay for the entire deployment.
For deeper insights, combine your LoRaWAN data with other tools. Top strategies for using data analytics to maximize crop yields can help you turn raw sensor readings into actionable field maps. And implementing digital soil sensors to boost crop health and productivity gives you a framework for integrating multiple sensor types.
Your Next Steps for a Cost-Effective Deployment
LoRaWAN field monitoring deployment does not require a six-figure budget or a team of RF engineers. It requires a clear plan, a willingness to walk your field, and a focus on the fundamentals: site survey, gateway elevation, sensor class matching, and validation testing.
Start with a single gateway and five sensors. Run a 48-hour test. Fix the problems you find. Then scale. That approach keeps your risk low and your confidence high. The data you collect will pay for itself in better irrigation decisions, reduced labor, and healthier crops.
Get your boots on the ground. Map your field. Pick your gateway spot. And build a network that works for you, not the other way around.
